Watch the Birdie!

Let me take you back to the heady days of summer, 2005. It was a different time, when self isolation was something that Howard Hughes was famous for, Don’t Stand So Close To Me was a Police song rather than a maxim for everyday life, Base Court at Hampton Court Palace was covered in grass, and Robert from the team had an idea for a photographic history event…yes it’s not just cookery for the Kitchen Team. As I’ve said several times before, cookery happens to be a great lens to look at history through, but sometimes it’s not just about the metaphoric lens that’s used.
Now right off the bat I’d better get the caveats in quick…2005 is a LONG time ago, mistakes in my recollection are highly likely. I’m no expert, that’s Roberts thing, unfortunately the current Covid-19 lockdown sees him stranded without access to a computer so I can’t ask him to fill in the details or gaps… I’ll aim to get an updated version from him as soon as is feasible, finally, this will very much be image heavy, detail light!

In actuality I suppose I should start back in 2001 when we visited the ALFHAM annual conference that was held that year at Colonial Williamsburg. As part of a jam packed time in the US we managed to fit in a day trip to Gettysburg to look around the town as it was only a few miles from where we were staying, and there was something, or someone there that Robert wanted to try to see. ..Rob Gibson.

Gibson ran a photography business that used the wet plate collodion process, the same process used during the US civil war, and was (as I recall) unique at the time we visited him, with every other photography business in town producing mock sepia prints for tourists and re-enactors. Rob produced the real deal and was absolutely the nicest chap in the world. With a kindred spirit in Robert, he spent ages explaining his process and showing us results, advising on best practice and even letting Robert have a go with his studio. By now Robert was already formulating plans to suggest a live photography event at some time in the future, and all the chatting with Rob Gibson merely cemented this thought in his head. There might be some drawbacks for us though, following the process authentically required the use of both high concentration alcohol as a solvent, and potassium cyanide as a fixer! Rob kindly explained which side of the state line you needed to be on to buy the 95% by volume grain alcohol that he used in the process, and we absolutely did not head straight to a liquor store to buy any, nor did we experiment with using it in cocktails…but that was unlikely to help us back home. The cyanide was a bigger problem.

After our US jaunt, Robert continued to work on his plans for an event and decided straight away to work in calotype rather than the wet plate that Gibson used. This was an earlier type of process introduced in 1841 by William Henry Fox Talbot and much more suitable for use in close proximity to visitors.

Vintage large format camera with modern focus plate

As well as the process to use, Robert needed to add more cameras and lenses to his personal collection, make a load more focusing plates and negative carriers for the backs of the cameras, a portable darkroom so that he could process in-situ, tripods, darkroom equipment and work on practising producing the negatives and taking prints from them; all of which took time. Fast forward to summer 2005 when the event was ready to go and for a couple of weeks, each day (light permitting) Robert, ably assisted by Marc, Robin and Barry, would take photographs all around Hampton Court.

Portable darkroom for processing in-situ.

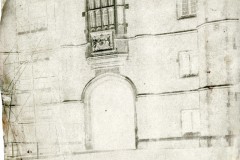
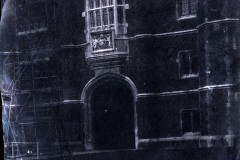
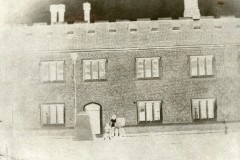
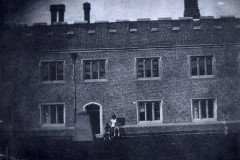
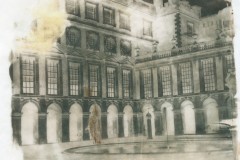
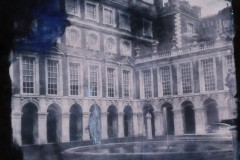
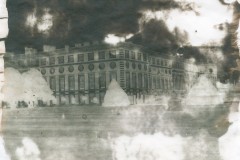
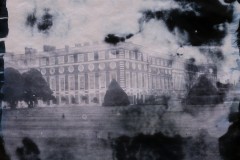
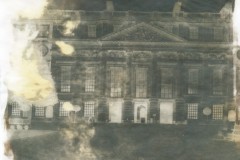
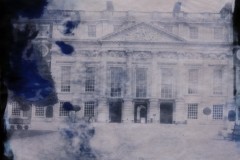
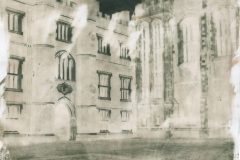
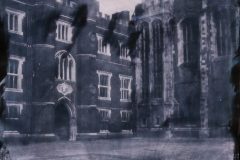
He would photograph the architecture, trying to replicate the earliest images taken of the Palace in 1845, he would take pictures of his assistants and he would photograph visitors to enable them to fully understand the whole process and the history and science behind it.

Marc explaining the photographic process
Processed negative of a family of visitors

By working in a darkroom in-situ he could process the images “in front” of visitors and even though he would not have time to make prints until much later in the project, the use of digital cameras would allow the negatives to be inverted for visitors to see the final results before they went home. This working in-situ is the principal reason for the brush marks and streaking on the images. Robert never did find a satisfactory brush or sponge for applying the chemical solution to the paper to make the film. He tried a raft of different methods but couldn’t find anything that would allow even application of the solution while working in darkness. I suspect that this is the main thing he’d want to correct if we could run this event again.

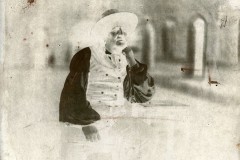
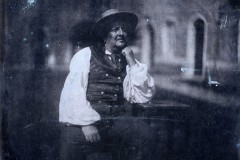
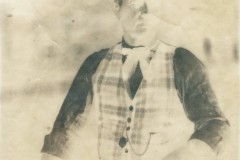
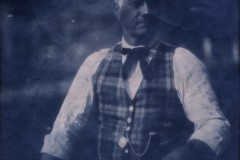
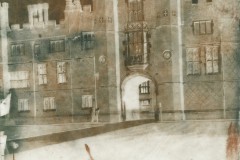
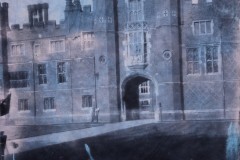
That being said, the results were fantastic! Processed outdoors, feet away from the camera and done so that visitors could watch and experience the process rather than to produce perfect pictures. Move the slider left and right to see the negative and positive versions.

NB all positive images used here are digital inversions of the scanned negatives, not scans of the prints. No post production other than inverting and reducing in size has been done

Fortunately for most of the time the weather was fantastic…brilliant sunshine and clear blue skies, which made for ideal photography weather, mostly because it really shortened the exposure times into the sub one minute bracket.

Robert preparing to photograph a family group. Image courtesy M. Hawtree
The subjects eye view. Image courtesy M. Hawtree

Some days though, were not so great, but somehow Robert managed to work wonders with ridiculously long exposure times, often measured in minutes, to get some great shots

Visitors chatted for ages about the science and history of photography as well as waiting patiently while the “film” was exposed and a photograph was taken.

Base Court
Looking at the image on the focus screen
Marc talks details to a visitor
Robin helps him take a picture of the picture

As well as visitors and the buildings, Robert tried his hand at a still life

Setting up a still life composition with some handy fruit. Image courtesy M. Hawtree

and when visitors weren’t forthcoming, there were always willing subjects waiting to have their portraits taken…any excuse to sit down for a few minutes!

Marc posing for his portrait
The processed negative, hot off the press

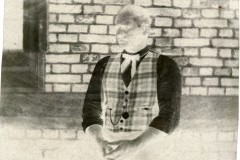
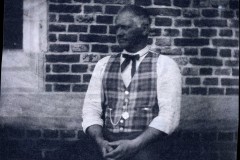
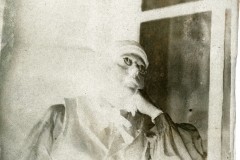
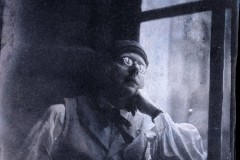
That last one is one of my favourites as it really illustrates that the camera does lie! As you can see from this image of Robin, he’s not that swarthy in complexion and his waistcoat is actually made up of dark colours, not the light ones that the positive image above might imply

Robin and Robert

It’s all to do with the wavelengths of light that the calotype is sensitive to, picking up a little more UV (I believe) than modern films and digital cameras…hence the darker face on both Robin and Marc who had been working outdoors quite a bit…hard to tell with Barry as he was channelling a more “Victorian side show wolf man” vibe for that week, and Robert was pasty faced from being in a darkroom for weeks!
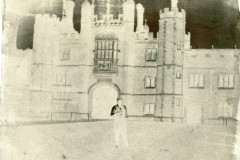
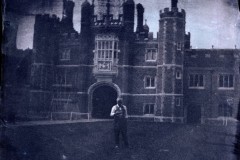
The other “lie” is the lack of people in many of the images of the Palace, though this is one that most people are familiar with…though it was nice to be able to show it “live” so to speak

The lengthy exposure time means that only Barry, who was stood still, shows up in the image; the rest of the visitors who are walking through the courtyard can only just be seen as a light blur (this is easier to see on the right and left of the positive image)

Long exposure times measured with a pocket watch rather than a stopwatch

It wasn’t just the main Base Court that they worked in, Robert took the camera and darkroom all over the place, from out in the East Front Gardens

Fountain Court

Clock Court

As well as looking out onto the Privy Garden from the upper floor of the south side of the Palace

This was a really successful event, that really showed that it’s not just through cookery that people can learn about history at Hampton Court Palace. Watching the actual process of tasks being performed, in this case real photographs being created, and being able to engage in the practical process really adds to the visit, it gives the opportunity to forge lasting memories and to learn new things about something that you thought was quite a simple topic.

Visitors waiting to look through the camera back. Notice the clockwork birdie on top of the foreground camera!
Taking a bigger image needs a bigger “film”
Robin and Marc explain printing a positive from a negative
Making a print by exposing the sensitised print paper to light through the negative
Up on the roof. Robert acquiesced to requests for a portrait from the builders…where they were working! Image courtesy M. Hawtree

I’m certainly keen on trying to repeat this again at sometime in the future (if we ever get out of the current COVID-19 lockdown), and will be sure to record it in more detail if we do.

Below is a gallery of all of the negatives (and their digital positives) that are worth seeing, click on the thumbnails to see the larger images. You’ll note that I didn’t get too creative with image titles, but that should allow you to easily match negative to positive.Enjoy!

A selection of these images was published in Alternative Photography: Art and Artists, Edition I

TTFN!

A Collection of Christmas Cokentryce!

I wrote this back in 2015. Originally I’d tweeted throughout the Christmas cookery week with updates of the work being done, then after the dust had settled from the event itself, I used the now-defunct Storify service to tie all the tweets together and flesh out the background and information that 140 characters wasn’t nearly enough space for.
With Storify set to be binned I managed to save the whole thing by exporting to a PDF and there this has languished for a few years…now re-purposed for you lucky people to enjoy.
As it was originally a Twitter story, I’ve done my best to reconstruct it as per the original, dated pop culture references and all…

From December 27th 2014 to 1st Jan 2015 the kitchens at Hampton Court Palace were once again brought to life with Tudor cookery. Over the 6 days we made three cokentryce, this is what happened and why.

So what’s a cokentryce, and why make 3?

There are a number of surviving medieval recipes for making a cokentryce such as this one from Harleian MS 279:

Harleian MS.279 .xxviij. Cokyntryce. – Take a Capon, & skald hym, & draw hem clene, & smyte hem a-to in the waste ouerthwart; take a Pigge, & skald hym, & draw hym in the same maner, & smyte hem also in the waste; take a nedyl & a threde, & sewe the fore partye of the Capoun to the After parti of the Pigge; & the fore partye of the Pigge, to the hynder party of the Capoun, & than stuffe hem as thou stuffyst a Pigge; putte hem on a spete, and Roste hym: & whan he is y-now, dore hem with yolkys of Eyroun, & pouder Gyngere & Safroun, thenne wyth the Ius of Percely with-owte; & than serue it forth for a ryal mete

[Take a capon and scald him [in boiling water] and cut him in half at the waist. Take a pig and scald him and gut him as the capon was, and cut him in half at the waist too. Take a needle and thread and sew the front of the capon and the rear of the pig together and the front of the pig and the rear of the capon together then stuff them both as you would stuff a pig. Now put them onto a spit and roast them until it is nearly cooked then coat with a mix of egg yolks, ginger and saffron followed by parsley juice then serve it for a royal meat]

“Clearly that’s a goose and not a capon…can’t you guys even follow a simple recipe?”

“at least you got the pig right…but hang on! I can’t see a boiling pot and they don’t loook pre-boiled and to cap it all, that’s a medieval recipe and this is supposed to be a Tudor kitchen so what the hell is going on here??”

The recipe for cockentryce is an excellent example to use to explain what our job in the kitchens at Hampton Court actually involves.

We’re employed to look at the kitchens of Henry VIII and to put them into context, both of the building and also in history. That means looking at ingredients, recipes, equipment, people, and documents….pretty much everything that might impact on our understanding of those rooms. We’re interested in process much more than taste or end result. It’s simply not possible to produce something that we can say tastes like it did in the past, we can though say that this is how it was made, and these are the techniques used and this is how it could have been done in this space. We are at times though limited by ingredients and equipment and the requirements for cockentryce are a good example of this. To fully understand we need to look at the rational behind the recipe and look at what it is calling for you to make. Although ostensibly telling you to “just” cut the two animals in half and sew the opposing front and back halves together that is missing the subtext which is the creation of, in the case of the recipe, two new animals. If you just cut ‘n shut the two halves together you end up with what Heston Blumenthal created for his Feasts programme…something that needs somewhat of an extensive tummy tuck to get rid of all the excess bunching at the join as clearly the two vastly differently sized animals are never going to marry together neatly

Heston’s cokentryce

Heston’s version may be following the recipe, but it’s missing the spirit that I belive was intended. When you see fantastic creatures in medieval manuscripts, such as this image from the Luttrell Psalter, they look fantastic but they also look feasible with all the parts joining together in an animalistic way. Many of the illustrations are not simply fantasies constructed by the illustrator but were images of what were believed to be real animals that existed somewhere in the world, they may not have been roaming around Europe but roam they most certainly did to the medieval mind; this is what the recipe for cokentryce is trying to create…an actual animal, not simply 2 halves sewn together for comedy effect. It is supposed to be as real and believable to the medieval diners as the dinosaurs in Walking with Dinosaurs are to modern TV viewers; we know they aren’t real but we expect them to look realistic and I belive the same held true for the cokentryce recipe.

Add. M.S. 42130 f182r

so it isn’t just a case of cut and sew if you want to make a “realistic” looking animal, the old adage of measure twice and cut once is true when making a cokentryce and it really helps if the ingredients are of a similar girth, something which causes slight confusion when ordering from the butcher as meat tends to be sold by weight not waist size!

It is also this need to create a new animal that means making 2 as stated in the recipe isn’t particularly simple.

To make a good looking end result the two halves need to be cut and joined so they look good and hold together so Adrian and Marc united them with a scarf joint favouring the front of the goose and rear of the pig in the cutting. This method allows the animals to be cut in such a way as to leave more skin than rib and flesh to give more area for sewing. This meant that out of each pair of animals only one new one could be created as the opposing halves were not suitable for joining and were used for spare parts on the main beast. I suspect that with more practice they would be able to end up with 2 new animals from each pair; practice as they say, makes perfect.

“Yes…but why the goose when the recipe calls for a capon?”

Capons are castrated roosters; the castration is done in one of two ways, either chemically or physically. Chemical castration of fowl has been illegal in the EU since the 1990’s…residual chemicals in the end product do the same to male consumers as they did the bird, and physical castration is illegal within the UK on animal welfare grounds, though it isn’t illegal to import true capons from areas of the EU where physical castration is still legal. This tends to mean that most birds labelled as “capons” in the UK are simply fat chickens, and they haven’t grown in quite the same way, aren’t quite the same shape, have too much breast and not enough leg and aren’t in great supply. Put simply, the goose is a substitute that we feel is acceptable given the restrictions on obtaining true capons and they have a similar measurement to the sucking pigs that we chose to use.

“ok, so you went with a goose that’s fine…but this is a medieval recipe and you’re in a Tudor kitchen….”

Well, leaving aside the argument that the first half of the sixteenth century is still medieval, as I said before, it’s almost the perfect recipe to showcase what we do in the kitchens at Hampton Court Palace…research, reconstruction, investigation, interpretation, experimentation and history all seen through the lens of food. We have no evidence to say that Henry VIII ever saw this recipe presentented before him, but likewise we can’t say it wasn’t. Just because the source material here is from the previous century it doesn’t mean it was only made in that century; cokentryce can be found in fourteenth century recipe collections and there’s plenty of evidence to show that recipes from earlier centuries were included in recipe collections in the sixteenth century and after all, the cokentryce according to Harleian MS 279 is a “ryal mete”. so what better place to make one than in a royal kitchen?

“and the boiling….or lack of it?”

quite simply we don’t have pots big enough to fit a goose or pig into! I also suspect that the scalding process referred to in the recipe is the scalding done as part of the slaughter process to make it easier to pluck or dehair the carcasses rather than an extra one done as part of the cooking process. Having tried scalding chickens before placing them onto a spit for roasting, their skin shrinks quite extensively which whilst making them look more rounded and smoother and neater to the modern eye, also has the effect of increasing any cuts or splits in the skin which, combined with the shrunken skin would make sewing the halves together that much more tricky than it already is. Oh, and before you ask about the stuffing, the flavour wasn’t important to us, the process was so we used bread as a stuffing. This had the advantage of being quick to insert, held the body out to a suitable dimension and held the animal reasonably firmly on the spit, which is the principle role the stuffing plays, but without the time consuming process or cost of mincing pork to use as a stuffing.

Sewing the halves together isn’t a quick job; the grease and fat in both animals starts to melt and makes everything extremely slippery.

and when it’s sewn together you need to think about how the beast will be posed, so in this case a stiff wire was inserted through the mouth and down the neck to provide an armature to allow the head and neck to be positioned well.

once on the spit, pins, wire and thread were used to position the legs and wings with the aim of cooking it in pretty much the final position it was wanted to be in as once cooked it would not be possible to move any of the limbs without breaking them off.

again, during the coating process we deviated somewhat from the recipe as previous experience has shown that using a green batter is more successful than simply coating with the parsley juice.

So the end of day 2 and the 1st of the 3 planned beasts was complete. It was good….but not good enough for Adrian and Marc, they wanted more, bigger and better and along with Jorge, set to discussing what improvements the mk2 variant would have.

Jorge wanted to apply more colour and use different colouring techniques with the next version whilst Adrian and Marc wanted more legs and a better, more natural overall look to the 2nd….and a tail, a much better tail than the one provide by the pig.

“our butcher has just delivered the meat for the last cokentryce that’ll be started tomorrow. He left with the look of ‘what the hell have you done with my beautiful meat??’ on his face”

here you can see the tail that Marc made from the back skin of the goose,stitched into shape and cut so that as it cooked and shrank it would hopefully form a serpent/dragon like appendage.

Adrian was keen to try and add scales to the pig skin and used Jorge’s spare pen knife, which was the finest and sharpest blade to hand, to cut scales into the skin. His thinking was that as the pig skin cooked and formed crackling, the scales would be revealed like the score lines in a traditional roast pork joint and that these would then show up through the thinner batter that was to be applied at the last stage of cooking….it didn’t work.

So 2 down…1 to go, and as with the previous ones, the guys wanted bigger and better. They wanted to take what they had learned from the previous 2 (which were the first ones they’d ever attempted) and improve on that for the last. Chances are this would be the last cokentryce that they would get to made for a while so they wanted to go out in style.

Linen rag paper coloured with the Brazil wood solution for the membrane with goose quills for the structure

unfortunately by the time it was all finished it was gone half past three and what little light there had been in the kitchens had gone. This meant that the flimsy cameras I had were simply not up to the task of taking pictures of the finished beast in all its glory. Suffice to say it had a golden bill and toes along with silver and gold tips to the dorsal spines that, much to Adrians shock had stayed in during the cooking process; a miracle considering they were just spare rib bones poked through the skin and into pieces of bread stitched into position beneath.

The paper wings were ok, but it would have been much better had they been real feather wings…something for the future perhaps?

You’ll notice that I’ve got all the way to here and not actually mentioned what it or they tasted like; possibly one of the more popular questions we were asked over the week. Well it is what it is, the front tastes of goose and the back pork, because that’s what they are and I suppose we should take it as a compliment at having produced a sufficiently convincing series of animals that people would ask what it tastes like.

It’s also worth noting the reaction that our visitors had to the whole thing, which was very positive. Young and old seemed to be genuinely fascinated and even those who expressed a negative opinion for whatever reason, were still interested enough to ask questions and discuss the process and history of the dish. We all spoke to hundreds of people for great lengths of time and all in all had a great, if extremely tiring 6 days making these three animals. It was a genuine team effort and one I am very proud to have been a part of.

…and so with all the visitors having left, the washing up done and the tables and equipment returned to the store room, all that was left was to sweep the floor and think about what we might like to do for future events.

The [Knot] Garden of Earthly Delights!

So, we’re a couple of days past the end of the February half term holiday that contained the Elizabethan confectionery cookery at Hampton Court Palace….how did things go? As with previous posts, this is picture heavy, text light…and likely to end up being split into a couple of posts just to keep you coming back for more and because there’s a lot to cram in from 9 days of work!

A garden in the Gardeners Labyrinth

Many of you will have seen the updates on Twitter over the week, so you’ll already know that the results look awesome…the guys really knocked this project out of the park.

I think it would be fair to say that the plans for this week haven’t had an easy life. I wrote a brief for the team at the end of last year listing what I wanted them to end up with…a sugar knot garden…as well as giving some specifications about what I didn’t want included or worked on (should be visually impressive and proportionate to the room it would be displayed in, but shouldn’t be “to scale”, should demonstrate correct period techniques and help visitors understand the use of sugar subtelties in the late sixteenth century as well as giving them some information about Tudor garden design and banqueting… but I left all of the detailed planning as to how this would be realised up to them. They had all of the Christmas cookery week to discuss ideas amongst themselves and to decide what they would be doing, how they’d do it, and more importantly, when it would get done. This was as much about the team learning to plan things that I would have done for them in the past as it was about working out how to make a sugar garden!

Their response to the brief was a good one, they gave some great examples of the sort of stuff they wanted to make, they said roughly how they’d make that sort of thing and when it might get made through the course of the 9 days, they even thought about who would be needed to bring which skills to each task…what they didn’t say was exactly what it would look like! So this past week has been as much of a journey of discovery for me as it has been for you on Twitter.

When I left you last, the team had made a start on the first quadrant of their plan, and the sketches and draft plats that they had created gave me some idea of what I should expect to materialise through the course of the next 7 days. They moved fast and converted almonds and sugar to marchpane paste for the hedges in swift order, all of which were textured to look like real hedges using Adrian’s nifty broken stick technique I showed in the last post. These hedges were then laid over the drawings on the plats they’d made out of replica medieval paper and hey presto…knot gardens!

the labyrinth quadrant…or Millennium Falcon?
the first quadrant, part coloured by mid afternoon on day 3

With all the hedging being made, it was easy to forget that there were all of the rest of the garden parts to manufacture as well, from architectural details like a fountain or decorative obelisks to gravel paths and flowerbeds. The gravel and flowers would be made from sugar comfits, what today we’d call hundreds and thousands, and these would be needed in bulk . Comfits are made by coating seeds with a thin layer of sugar syrup, then drying it out until it’s hard and then repeating that process a number of times depending on how big you want the final product…this can be anything from a few dozen times for hundreds & thousands, to a few hundred times for gobstoppers! Ivan Day has already described the process in great detail which means that I, a very lazy man, do not have to. Making comfits is something that the team have been slogging away at each cookery weekend through January and early February to ensure a stockpile of sufficient size for this garden project…if only they had the modern mechanised process of making them with what look like large heated copper cement mixers to rotate the seeds and syrup automatically.

Making comfits using the balancing pan over a portable charcoal stove
Once they're nearly big enough, coloured syrup is used for the last few coats to build up the final appearance
Once they’re nearly big enough, coloured syrup is used for the last few coats to build up the final appearance
Saffron for yellow and cochineal for red are some of the colouring’s used for the comfits and sugar work, along with parsley for green and woad for blue

Probably the best historic description that’s easily accessible for comfit making is contained in Delights for Ladies… by Sir Hugh Plat it’s chock full of detail and echoes descriptions and mentions that are found in earlier texts and recipes.

Diana Fountain from Nonsuch Palace

For the architectural features like the pillars, columns and fountains, I’d specified to use sugar plate made from fine ground sugar and gum tragacanth. This was to be moulded with wooden or plaster moulds, not free modelled…which they’d have much preferred (I know, I’m a total git!). This meant that they would need to plan what they wanted to make, then make moulds of those items and only then, could they begin to manufacture the pieces for the garden…easy right?!

Again, they grasped the task with both hands and really went for it. While some of the ideas for moulds were complete from the get go…an architectural obelisk, and a plinth/base for it for example…many were planned with no particular end function in mind, such as decorative strips that would eventually find a use as applied decoration on the fountain base, or to form the steps of the classical temple.

Obelisk and plinth mould carved by Robert
Mould for a decorative strip, image courtesy Ian Franklin

With these moulds made before the start of the week, work could begin at any time, but the need for a number of other moulds only became apparent mid-way through the week, once the team started to work out what was and wasn’t likely to be achievable, or just went and had some mad ideas. These included the mould for the rustic arbour pieces as well as the columns for the temple. As we’ll see later, the arbour pieces were designed to interlock, providing support for the completed piece as well as looking like tree limbs and leaves.

wooden mould
Mould to make “rustic arbour” pieces, carved mid-way through the project

Along with the carved wooden moulds, I had challenged them to make and use plaster of Paris moulds as they had done when they made the sugar queen in 2016/17, though on a considerably smaller scale this time!
Robin decided that he’d use this technique to make the figure that would top the fountain he wanted to make…this would be based on the Diana fountain image a few pics up from here. His plan was to sculpt a wax master of the figure, make a two part mould from this and then use that mould to either cast boiled sugar figures (really adventurous), or press sugar paste into it to make them that way. As is more and more the way of late, because of other responsibilities, I was out of the room when he started the process of making the mould and only caught it as he poured the second batch of plaster to make the top half.

making a plaster mould
Making a two part plaster mould…pouring the second half of the mould.

Having made a bed of plaster within clay retaining walls, the small wax figure was laid into the plaster and locating marks were sculpted into it just before it fully set. Then an hour or so later, the second half of the mould was poured in and the whole left to set…which is about when Robin realised that he’d got so carried away with wanting to get the mould made, that he’d not actually added any barrier or release agent to either the wax figure, or the first half of the mould. Had he just encased his delicately carved wax model inside a block of solid plaster??

No…he was a VERY lucky chap, and at the end of the day when the plaster was fully set and dry, some gentle prising with a stout blade…and a few choice words uttered…popped the two halves of the mould apart. Admittedly it did decapitate the figure, but as the mould was good, with no air bubbles or voids, that mishap could be overlooked. The two halves were popped into the airing cupboard to dry overnight, and the next day Robin used it to create tiny “marble” statues around 5cm tall, each one made slightly different by adding more sugar that was free modelled to make draping cloth or clothing pieces.

sugar statue
Marble stat…sorry, I meant Sugar statue

These were all well and good, but his plan was for a figure topped fountain, complete with water…and fish…because why not?! Obviously it wouldn’t be real water, boiled sugar would substitute for that as it should set hard but stay transparent enough to see the tiny sugar fish that would be “swimming” in it, but it did mean that the main tank had to be “water” tight.
The image of the Diana fountain was fairly easy to follow, especially as in July 2019, Robin had made a series of moulds that made up an octagonal box and he hoped he could re-purpose these to make the main base/tank of the fountain; it’s actually why a fountain was suggested by the team as they though it would be fairly easy to make and that time could then be spent on other details within the garden….that didn’t really work out that way though.

sugar models
Sugar “trinket box” and covered cup

It turned out that the box mould was a little smaller than the fountain needed to be, so Robin proceeded to create a kit of parts of flat panels cut from a sheet of sugar paste. When these were dry, they were “glued” together with a thinned down sugar paste and the joints covered in thin strips of paste for rigidity and decoration, as well as helping to seal the tank to keep the “water” in.

Robin making the fountain base/tank

as an aside here before the details of the rest of the fountain, it’s probably worth pointing out the bone tools Robin is using…which he had to make for the job…a nice and useful piece of recycling kitchen waste…and by custom making, it ensured he gets the exact tools he needs, not some that are only “close enough” for the job.

A selection of bone modelling tools

I’m going to leave it here for now and give myself a couple of days to write the next post and you time to digest this…it’ll also allow me time to fit in the day job and prepare a report on the past week, carry on planning the next major cookery run at Easter, and sort out end of year reviews for the team…fun or what?!?
By the way, there’s cookery in the Kitchens at Hampton Court each weekend through until the end of March, so plenty of opportunity for you to visit and see some of this sort of thing in the flesh…who knows, you might even fancy lending a hand! Details of cookery events at Historic Royal Palaces sites can be found by visiting the website and searching for “what’s on” at Hampton Court or Kew Palaces (if the eighteenth century is more your thing)

TTFN

Hello Sweety!

Waaaaay back in the mists of time (2016) I set the Historic Kitchen Team the task of trying to make large figurines from cast boiled sugar; you can read about it <HERE>. Try as they might, there was little success…but we did end up with a very nice mould that’s been sat in storage ever since crying out to be used. Well this October, for the school half term holiday, the opportunity presented itself to push the team one more time to try to produce a cast sugar figure…and this is the short update about what happened, though as there’s a picture of a dirty great sugar figurine at the top of the page, I’m pretty certain it’s not going to be a great shock to you when you get to the bottom of the page.

But was that something they actually did in the past I hear you ask….well, as I detail in the post from 2016 (don’t worry, you don’t have to scroll back too far through the blog to find it, I’m lazy and haven’t written a great deal since then) there are plenty of recipes that run through the process, so it seems likely.

‘To mak ymages i[n] suger’ snippet
Harley M.S. 2378 f161v
(C) The British Library
‘To mold of a lemmon, orenge, peare, Nut &tc. and after to cast it hollowe within, of sugar.’
Sir Hugh Platt. Delightes for Ladies,1608

There’s also descriptions of subtelties in the form of people being presented to the table, such as the description of  vaulting and leaping figures served by Cardinal Wolsey to French guests in Cavendish’s “Life of Cardinal Wolsey” 1 as well as suitable Elizabethan period references…all very handy as Hampton Court is showcasing all things Elizabeth this autumn (2019), to coincide with the temporary exhibition of the Lost Dress, the former Bacton Altar cloth, thought to be made from one of Elizabeth’s dresses.

So, fast forward to the present day and the nine day half term event, during which I charged the team with the task of repeating much of what they’d done in 2016, but with the added demand of having to produce cast models.

plaster of Paris mould of a female figurine
Half the plaster mould of the figurine ready for some test casting

The first test of the week looked promising, and half a queen was produced in short order…though not by pouring boiling sugar into the mould, but rather by creating a sheet of sugar then slumping it into place to create the form.

The resultant half a queen needed a stick to support it…which very swiftly begat the concept of a “lickable, ‘lizabethan lolly”!

hmmm….lollipops!

 This test piece was left overnight when it was thought it might firm up as it dried out a little more in the airing cupboard…

failed sugar figurine
The Blob!

but that was not to be, and by the morning,the once 3D form of the front of a queen was now an accurate sugar model of a Dr Who character from the Troughton or Pertwee eras.

Quite a lot of the rest of the week was spent with the team fixated on improving the results of the slumping method and with creating a crystal clear sugar that would set hard despite the awful weather we had over the week and the rain soaked and sopping wet atmosphere in the Kitchens…

Fish Court at Hampton Court Palace
Henry VIII’s confectionery was on the first floor at the end of Fish Court, just behind and to the right of the windows at the end

it’s no great surprise to find out that confectionery kitchens are nice and warm and dry, and Henry VIII’s were no exception.

Situated at the end of Fish Court in the midst of the Kitchen complex, upstairs above the pastry house where it could be kept warm and dry by the heat from the ovens and the working rooms below. Here in 1539, Bonaventure Carter, James Fulgam, George Herd and John Bartlett would have worked to produce sweet delicacies for King Henry VIII and the upper echelons of his Court…but I digress…back to the Elizabethan stuff!

The obsession with the slumping wasn’t what had been asked for and isn’t how the recipes describes figures being made, so that had to stop and work needed to concentrate on working out how to work with boiled sugar in quantities that could fill the mould, or at least fill it to coat a layer sufficient to hold the shape of the Queen figure and most crucially, survive removing from the mould (the principal problem back in 2016).
By now, Friday was upon us and there’d been no great signs of progress. Several changes of staffing  had occurred and work on comfits was proving to be popular because it was nowhere near as complicated as the casting work was turning out to be. 5.45pm on Friday rolled round and I left for a weekend of shopping and the normal “adult” things that have to be done on days away from work, only to be greeted at four o’clock on Saturday afternoon on Twitter by the image of a ‘perfectly’ cast sugar figure posted by Jeremiah from the team…they’d actually done it, pulling it out the proverbial bag at the 11th hour.
cast sugar figure in the shape of Queen Elizabet ILike buses, it wasn’t long before Robin (it was Robin and Jeremiah who were working on the figures over the weekend) sent me a photo of a second figurine…

The second successful Sugar Queen

This one was much less caramelised than the first one as you can see from the handy mobile phone torch being shone through it from behind.

Unfortunately, these two were the only two sugar queens they made, but its not about quantity, its about the ability to make them, and to repeat making them which is the whole point of the recipes…to be able to make as many as you need, repeatedly.
On returning to work after the weekend, I was able to check the team camera to see if they’d managed to record any of the manufacturing process…which luckily for all of us, they had (click on the images to see larger versions).

So, is that it you ask? Pretty much. As is was all rather 11th hour, there was no real time to experiment with the decoration as it’s described in the recipes and colouring the finished article. Likewise, time didn’t allow for working on a less clear version of the sugar to see if not caring about clarity would make a difference. The recipes never mention the end result being clear, especially as they go on to describe how to colour and paint them with coloured sugar. The notion of ‘clear’ is a modern one in my opinion, and not likely to be something they were either worried about or possibly had worked out how to achieve as it took a LOT of work and patience to keep the boiling sugar from crystallising on the stove or as it cooled and started absorbing moisture…still, lots of things to look at next time I pick this as a topic to work with. =o)

  1. George Cavendish, The Life of Cardinal Wolsey, 2nd edn (London: Harding and Lepard, 1827) (pp. 197–198)

The Sugar Queen – Part 3 – Boiled Sugar…Finally!

So just the last two days of the Christmas event to cover and we’re done and dusted…is it just me or does Christmas seem a really, really long time ago? Where have those two weeks gone?

Anyway…day 5 dawned and there was no getting away from it for Adrian and Jorge…they would have to make a start on the boiled sugar working.
As a measure of caution, they decided to only cast one half of the figure, they weren’t sure if the sugar would come loose from the plaster when it had cooled and didn’t want to go the whole hog and create a huge sugar and plaster lump that they couldn’t pull apart. Both of them eschewed the instructions in the Platt recipe for casting sugar items to soak the mould in water before use as they reasoned there was still plenty of moisture in the plaster that hadn’t completely dried still…I very much suspect this was the root cause of what was to come, though as always hindsight is 20:20.

First job…boil some sugar into a syrup and then keep going until it is at the hard crack stage or thereabouts

The first sugar batch

It’s a lousy picture, but it really does do this attempt justice. As I have said several times before, the Tudor Kitchens at Hampton Court Palace in the winter are most definitely NOT the place to attempt sugar work, hell, even in the summer they’re less than ideal. As the sugar began to melt and the liquid bubbled…in the blink of an eye the whole lot crystallised and turned into a dry lump of junk, fit for nothing. The problem was the cold and damp…after a nice dry week, albeit a cold one, the weather had changed and warmed up enough for all the frost to turn to water and the fog of the day before had been washed away by a light but constant drizzle.
My suggestion for the second batch…pre-warm the skillet before putting the sugar and splash of water in; which they duly did and it seemed to do the trick, allowing the sugar to melt and start cooking away.

Pretty soon the whole mixture was boiling away nicely and after a few drop tests into some cold water both Adrian and Jorge decided to go for an initial casting

With Adrian taking the mould in hand, Jorge poured in the boiling sugar and with a combination of tilting and pouring the whole of the half of the mould was coated.

The first half coated in sugar

Showing admirable restraint, both Adrian and Jorge then left it alone for a few minutes rather than try to pull it out straight away and gave it a chance to harden off…in truth they were deep in conversation with the fascinated visitors to the Kitchen, explaining what it was they were doing and why, and fortunately not blaming me for the insanity of it all.
A few minutes passed and it was time to try to remove the sugar…

…it was however, stuck fast. Perhaps they hadn’t left it long enough? Perhaps some time would cause it to harden more…or soften in the damp atmosphere…or…???
It was at this point I left the sugar casting to catch up on some paperwork and knock out a tweet or two in the relative calm of the office. It was by now late in the day and I got into the ‘zone’ with some writing and lost track of the time. When I emerged from the office the Palace was closed and the Kitchen empty…I strode into the break room and scanned round looking for some semblance of a cast sugar figure, but saw nothing. Adrian looked at me with a look that spoke volumes and I walked into the break kitchen to put the kettle on. As I walked to the sink to fill the kettle I was greeted by this sight…

I guess it didn’t come out easily then

…the plaster mould soaking in the sink to try to dissolve the last of the boiled sugar! Neither time nor damp atmosphere had helped remove the bonded sugar and the only recourse had been to soak the whole thing in water to try to dissolve the bond between the two materials…or at least soften the sugar enough to finally pull it clear of the plaster. So much for tea…it was time for a beer and some thinking!

Day 6 – Go large then go home!

Day 5 had been New Years Eve, Adrian had a life and thus more interesting places to be…dancing the night away near Heathrow airport; a third of the team had gone home and the rest of us sat in front of one of the worst DVD’s I can recall ever watching, all of which meant there was little discussion about how to crack the casting problem that evening. Day six dawned and the new year brought new ideas to Adrian and he thought he’d cracked how to solve the sugar bonding to the plaster problem. unfortunately this idea meant completely abandoning the whole of the casting process as described and “solving” the problem by means of redesigning the whole process and mould material…in short, cast into a clay lined mould. As innovative as that might have been, and more of which shortly, solving the problem by throwing the whole thing away and inventing a new method wasn’t a solution. The end result, the cast figure, wasn’t as important as trying the process the correct way and then, not ignoring the parts that ‘don’t work’ or make no sense, but investigating the whole and complete process…just because we can’t make it work doesn’t mean the recipe/description is wrong after all, just that we are.
I will confess that at this point I lost a lot of interest in the sugarwork. Both Jorge and Adrian, though appreciating the idea that following the recipe as it was written was a good thing had gone off on one and were trying to come up with solutions to the problem rather than simply following the words…I went and concentrated on the roasting and the multi spit and got lost in the fire for a while

I returned from my funk just in time to see Jorge put the skillet down having just poured their final attempt using the plaster mould, though this time they had lightly greased the mould with oil before pouring.

Can you see the sugar?

A short wait for it to set and it was time for the moment of truth…

Heroic failure! A little longer and who knows what might have come out. Adrian was being a lot more positive than Jorge and his optimism was rewarded a short wait later as the remnants of what had solidified popped out of the mould with a deft pull

Wile the plaster attempt had been cooling they tried the clay lined version using the second mould

The clay lined mould

This was worse and they got no results from their ‘solution’…history was partially vindicated  😎

So was that it? No, not a chance. While all of the casting shenanigans had been going on, Elly and Tom had persevered with the press moulded sugar figure and worked on a base for her based on the Ditchley portrait of Elizabeth that had kick started the whole affair.

And with that, the sugar queen was complete…or as complete as she was going to get. A little bit of a brush and tidy up, a few more photos for the record and then this ephemeral object was gone, her job done.

Was it a successful project?…Yes, most definitely, thousands of people coming through the Kitchen saw the work progress over the course of the week and tens of thousands watched the trials and tribulations online via Twitter.
Could it have been improved?…Of course! I’m sure that both Adrian and Jorge and all the rest of the team that put something towards the sugar figures had the skill and abilities to not need to have been as cautious as they were when it came to the casting. I think that if they’d gone for the casting first, following the recipe, rather than staying safe and going for the press moulded figure then there may well have been a complete cast figure by the end of the week…though what was I saying earlier about hindsight?? The flip side to that would have been no press moulded figure for people to see early on through the week and it could all have kept failing as the final casting attempts did and we could have ended up with nothing at all to physically show after six days apart from two plaster moulds. Those are the choices that were made though and we ended up with a fantastic end product.

As always, I doff my cap to my more dexterous colleagues, as I said in a previous post, I just come up with the ideas, they’re the ones who actually make it all a physical reality for you all to see. Also we must not forget all those in the team who were working on other things over the week like the roasting, marchpane and comfit making…all of which I’ve ignored here, but are so important in order to bring the Kitchens to life and make everyone’s visit extra special.

A usual…comments gratefully received. There’ll be another short break before the next post on boiling in pewter vessels, and a new gallery of all the images from the event as I have a conference paper to write and present within the next week along with a mountain of paperwork and meetings, but keep an eye out on Twitter and here for the next blog update.

The Sugar Queen – part 2 – ̶C̶a̶s̶t̶i̶n̶g̶ ̶T̶h̶e̶ ̶S̶u̶g̶a̶r̶ – Errmm…Nope!

So, last time I went through the first couple of days of the Christmas event and detailed how the plaster of Paris mould was made ready for casting the sugar figure. The next stage of the plan was to follow the instructions in the Platt recipe for casting in plaster moulds and soak the mould in water; whilst this was happening there would be a little experimentation with boiling sugar and then about three-quarters of the way through day three the mould would be dried, put together, filled with boiling sugar and an attempt made at casting the first figure. Meanwhile, another part of the team would make a second mould from the wooden former in case things went awry with the casting in the first and it became unusable or broken in some way….well they were what I thought the plans were at least.
One of my major failings is that because I live with the planning for so much longer than the rest of the team I can never remember if I’ve passed on all the details to them, or if I just think I have! Posting a blog post with all the details in is one thing, but did I actually remember to tell all of the team these details? Either way, the result was the same and over the course of day 2 and through the evening it became clear that Adrian and Jorge had decided to forge another path. Yes a second mould would be made but there would be no casting with boiled sugar…worries and doubts had set in and they felt much more confident in trying to get a full, press moulded figure out made from sugar paste and then work up to the cast boiled sugar…so much for go large or go home!

The first thing they decided to do was make a second plaster mould, but this time they would use one half of the first mould to cast against rather than the clay. This meant the wooden figure was placed back into one half of the mould and then the whole exposed surface, wood and plaster, was then coated liberally with the tallow & oil mixture.

This was then coated in plaster exactly as before and when set, the original half was removed and the mould finished exactly as with the original…though in this case it contained a few more air bubbles than the first attempt and these needed to be filled with some putty consistency plaster after the fact

While Elly and Jorge were working on this, Adrian was working on some test pressings before steeling himself for a full on queen.

The sugar paste used was a rough and ready variation of the recipe from Ruscelli’s “The secrets of the reverend Maister Alexis of Piemont 1

all the ingredients were there, just not necessarily in the same order or quantities. Once made, and as Adrian started to fill the front half of the mould, it became clear that it would take an awful lot more paste to fill the entire mould…good job this was just a test. He decided to push the boat out…and push his luck, by trying for a complete front of the figure, and to make it a bit more flash, he used some of the marchpane that Zak had been making with various visitors, to give some colour and pizzaz to the face and hands. These parts of the mould were filled and then the rest had the standard sugar paste pressed into it at around 10-30 mm thick depending on both a) what was needed and b) what past was left, having started at the head and worked down. The results were pretty damn impressive, if a little flimsy…and this at least would give people the idea of what was being attempted.

With some more marchpane and sugar paste, Adrian finished off the day seeing how much material he was going to require to press out an entire figure

Once the mould was separated, the results were encouraging…even if it wasn’t the boiled sugar I had hoped for.

The test torso…not bad at all

…and so finished day 3.

Day 4

In an ideal world, day 4 would have seen the press moulding done and finished with nice and early and thence they would have moved on to the real deal, the boiled sugar. Unfortunately, it wasn’t to be so, only this time it was most definitely my fault! A previously booked and unchangeable appointment meant I would be away from the Kitchen for the bulk of the day, the instructions I left…under no circumstances do anything interesting or adventurous as there wouldn’t be anyone there to record it! I HAD to leave by 12.00 and absolutely no later in order to make the appointment, so anything interesting had to be done PDQ at the start of the day…Adrian did not disappoint!
First mission…paste…lots of sugar paste

After a change of hat and Adrian starts churning out sugar paste

Once the paste was made, it was simply a case of packing it into the plaster mould

and then closing the two halves together…with some vigour

From this point on things got a bit…well, physical, with an awful lot of grunting and groaning from Adrian as he tried to force more paste into the mould so that all the detail was filled and there was sufficient wall thickness for the whole to not sag and droop when it was finished.

Rolling out paste for a base

It turned out that without a solid base though there was little chance of the figure standing upright upon removal from the mould, so Adrian made a base out of a hastily made batch of paste and used this to seal the bottom of the skirts, the void now being packed full of flour to hold her steady when she was complete.

All it took then was a little bit of fiddling and the first half of the mould popped off a treat. This meant Adrian could do a quick tidy up around the join while the figure was still supported by the back half of the mould as he wanted to avoid excessive amounts of handling until the paste had hardened a little

The torso came loose from both halves of the mould at first, which caused me a little concern that the back of the figure may have been incomplete or broken…something I need not have worried about

Then with the deft hand of a master…as well as a little shaking, cajoling and a healthy dose of luck, out popped the Sugar Queen!

I think the voice of the child watching from Adrian’s elbow said it all…”Oh my God! Wow!”

Free at last!

By now it was 12.30…and I was VERY late!
As I sprinted out of the Kitchen my parting words were once again…”Don’t do anything interesting!” and with that I was away for the afternoon. So what did I find on my return? Turns out they’d been quite busy…

A pair of press moulded sugar queens in sugar paste and marchpane

Marchpane and sugar paste figure

…and that’s how day 4 finished.

Had they chosen to, the surface of the figures could have been smoothed out quite a bit before the paste set and that would have removed all of the cracks and imperfections, but to be honest, I don’t think anyone cared. They’d managed to get two fairly impressively large figures made and run through the process in front of a couple of thousand visitors plus several thousand more online…they deserved a beer…or two!

Next post…the last two days of the event and finally some boiled sugar casting!

As always, comments gratefully received, and once again, some of the images will expand to a larger size if you click on them, so give that a go if you want to see some more detail.

  1. Girolamo Ruscelli, The secrets of the reverend Maister Alexis of Piemont : containing excellent remedies against diverse diseases, wounds, and other accidents, with the maner to make distillations, parfumes, confitures, dying, colours, fusions, and meltings …, trans. by William Ward (London: Thomas Wright, 1595) (p. 61).

The Sugar Queen – Mould Making

So the equipment is cleaned and put away, the team returned to their homes and the dust has settled on another Christmas of cookery at Hampton Court Palace…but what did we achieve?

Two posts ago, <HERE> , I detailed the plans for the work over the week and gave a little insight into the methods that would be applied to making a cast sugar figure in front of our visitors. Those who follow on Twitter will already have seen most of the results but, free of the 140 character limit of tweeting, I can flesh all that out for you here and lay bare the highs and lows for those who eschew Twitter.

So the plan was a simple one, we would make a wooden former, we’d make a mould from that former, we’d cast a positive in sugar from that mould, and Robert is your mother’s brother…we’d bask in adulation and glory! As always through this, when I say ‘we’ I mean ‘the team’ and then, mostly not me…I come up with the stupid plans and can manage the donkey work when called upon, the skilled work needed for this insane idea was all due to the rest of my extremely handy and talented colleagues.

The wooden former from the front

The wooden former from the side

Contrary to his Davros related text message, Adrian turned up with a cracking wooden model to be used as a former for creating the mould with. Apparently she’s a little lopsided, but only Adrian noticed that…it irks him because he made it and it wasn’t “as good as it should be” but I’m damned if anyone else noticed…even when he pointed it out to us.
The plan of action was : Day 1, coat the wooden former in wax to seal it and then get this ready for casting. Day 2, construct the casting box, line with wax/oiled paper and begin the casting process with plaster of Paris. Taking the resultant mould and leaving it somewhere nice and warm to dry overnight (shouldn’t be a problem, everyone at HCP seems to like having their office at volcano like temperatures 😉 ). Day 3, investigate boiling sugar and spend the day making sugar paste 1 as practice for … Day 4, cast the first attempt in boiled sugar; trying as many times as possible through the day…continue this for the rest of the week. Simultaneously,  from Day 3 on, make a second mould with which to make press moulded sugar paste figures with and to use as a backup when we inevitably took things too far with the first mould and ended up with an irreparable kit of parts.

Day 1

Day 1 started with a bit of a shock…ice and frost! We were expecting things to be less than conducive to confectionery work in the Great Kitchen, after all there’s a reason that the original confectionery area was above the pastry department…it’s large ovens meaning that the rooms above would remain warm and dry, unlike our Kitchen which is cold and damp, I suppose at least now it was just cold and much less damp than usual.
First task, seal the wooden former, so Jorge fired up the portable stove while Adrian got some beeswax from the store cupboard and threw it into a skillet to melt.

Once the charcoal was up to temperature, the wax filled skillet was placed on top and left until the wax had all melted. At this point, Adrian ladled it over the former until it was mostly covered and he then began the rather laborious task of smoothing the lumpy wax out so that the wood was evenly covered and sealed for plaster casting.

Clearly it would have been so much simpler to just have a deeper pot and more wax allowing the former to be dipped into this to coat it in one go, but unfortunately we a) didn’t have enough wax to do this, b) didn’t have a suitable pot that both wax and former would adequately fit into and, most importantly c) We aren’t allowed to do that sort of thing…and a damn good job too! Our key Principle at Historic Royal Palaces is Guardianship…

“We exist for tomorrow, not just for yesterday. Our job is to give these palaces a future as valuable as their past. We know how precious they and their contents are, and we aim to conserve them to the standard they deserve: the best.”

We are extremely lucky in being able to cook, experiment and experience life within the Kitchen at Hampton Court as close as it is possible to  in the ways these things were done in the past, there are limitations though and these are there to ensure that the building is still there for future generations to come…and not coated in beeswax by a bunch of cretins playing with a mad idea!…but I digress (as usual).

Day 2

By the morning of day 2, Adrian and Jorge had completely rethought how they wanted to make the plaster mould. Rather than make a mould box and create a large two piece mould that was essentially a cube in shape with the hollow of the figure in the middle, they wanted to use thicker plaster to cast a more organic mould off of the wooden figure and without using a casting box. Admittedly this would save a lot of time that would have been spent making the box and would end up using much less plaster…a win all round. All that would be needed would be to divide the wooden former into two halves with some clay, create a fence of clay around the bottom of the figure

and then slap on some thick plaster. Once side one was dry, the clay could be removed and a second coating of plaster on the un-moulded side applied to create a complete two-part mould.

Of course, things aren’t ever going to be that simple, and wax or not, the former still needed a coating of a mould release/grease to ensure that it slipped from the plaster when it had set. This was made of a mixture of tallow and oil, heated together over the charcoal and then liberally applied to the former and clay surfaces that would be coated in the plaster. Once this had been applied and all was cleared and ready to go, Adrian and Jorge mixed the plaster up to a consistency of raw meringue and began to liberally apply it to create the first half of the mould.

The first half of the mould made

The plaster didn’t take too long to harden to a degree that meant Adrian wasn’t forced to hold it in his hands all afternoon and they were left with half a mould curing in the Kitchen. Once this was set sufficiently the clay could be peeled off and the plaster tidied up a little where it had formed areas that would allow the back half of the mould to lock to the front with no chance of separation.

Once this process was complete a clay fence could be added to the base of the rear of the former, and another liberal coating of the grease mixture applied all round before coating with more plaster.

Once the final coat of plaster had been applied, and as you can see from the videos, the consistency was fairly varied meaning that there was quite a difference in the amount of water in the batches and thus quite a difference in drying time, the whole affair was left to cure for a while until it was solid enough to move on.

The completed mould curing

Once a suitable length of time had elapsed…calculated in tea breaks and trips to warm up in the break room; it’s not often you can be thankful for an exothermic reaction like plaster curing to keep you warm in a cold kitchen 2 …it was time to take the leap and crack the mould open!
First step was to trim the edges with a knife to make sure all of the splashes and any plaster overlap that still remained between the two halves was finally removed.

Then with a little bit of coaxing, the rear portion of the mould popped off…

The rear half of the mould

Then with a little more wiggling and jiggling…and a few muttered words

The former was free and we had two halves of a mould ready to go!

The front half of the plaster mould

All that was left was to do a quick test press with some sugar paste to check that the figure would be visible

then it was off to a warm, dry place overnight to dry  and fully cure.

Whilst typing this it has become very clear that there is no chance of me being able to write a single post that covers the whole of the week’s confectionery capers…not if I want you to not die of boredom whilst reading it at least. So consider this the first post, with more to come when I’ve typed it all up and had a little family time to myself; I’ll also add a gallery of all the images that I took over the week, but again, that’ll have to wait a few days. For now it’s worth noting that some of the images in the post will expand to larger size if you click on them…might make some of the detail a little clearer for you.

As always, comments gratefully received…positive, negative, ambivalent…and keep an eye out for the next part some time early next week.

  1. Girolamo Ruscelli, The secrets of the reverend Maister Alexis of Piemont : containing excellent remedies against diverse diseases, wounds, and other accidents, with the maner to make distillations, parfumes, confitures, dying, colours, fusions, and meltings …, trans. by William Ward (London: Thomas Wright, 1595) (p. 61).
  2. Yes, I am well aware of the dangers and damage that the heat from curing plaster can cause. A full risk assessment was carried out and the plaster work was carried out as safely as is possible to do so. No hands or other appendages were kept in wet plaster as it cured, only the outside of the mould was held and then only for very short lengths of time

Christmas Confectionery

So with Christmas 2016 fast approaching I guess I should get my finger out and tell you what the plans are for the cookery at Hampton Court this year.

As with last year the overall theme of the event, both upstairs in the “nice” bits of the Palace as well  as down in the Kitchens, will be the reign of Elizabeth I, but what exactly will we be cooking in the Kitchen I hear you cry?
Over the last few years of special events at Christmas and Easter I seem to have painted us into a corner of having a “thing” that will be made over the span of the event so that visitors can see the progress over the course of the week and this year is expected to be no exception. The “thing” has always been chosen so that multiple period techniques can be showcased or attempted (depending on your point of view), that it can be made in multiple discrete steps, that it’s fairly visual and would make good images for social media, is interesting and above all has a “I didn’t know they did that” component to it…all of which, as might be obvious, makes working out what the “thing” is going to be, really, really difficult. In the past we’ve made cokentryce, a sugar and a pastry knot garden and a pastry castle but none of those plans had come easily to the table…relying more on me being struck with divine intervention to come up with the ideas than any great level of thought and planning and I suppose the same is true of the “thing” for this Christmas cookery.

model castle made to represent the marchpane given to EiR in 1561-2

It was while mulling through ideas with Barry in mid September that we were struck by descriptions of the New Years gifts 1 given to Elizabeth by various people, which included marchpanes “made like a tower, with men and sundry artillery in it”, which those of you who have visited Hampton Court prior to 2006 may remember seeing reproduced in the original kitchen display. It wasn’t so much the tower and artillery but rather the men that we were taken with [no sniggering at the back!] and we thought that this could be the start of what the “thing” might be forming for us. Subtelties made in the form of people are also mentioned in Cavendish’s Life of Cardinal Wolsey 2  and so this seemed like an idea that could have potential…making a subteltie in the shape of a person, but of whom, made from what and how?

Queen Elizabeth I (‘The Ditchley portrait’) by Marcus Gheeraerts the Younger, circa 1592. (C) National Portrait Gallery, London

Well the “of whom?” was easy…let’s make a subteltie of Elizabeth I…or at least, a female figure in Elizabethan dress that will be based on the shape of the Queen in the Ditchley Portrait as that’s an instantly recognisable representation of an Elizabethan woman…and has some significance for the “upstairs” portion of the Christmas event at Hampton Court this year; the “from what and how?”, that’s less easy.

We could make it from marchpane, at its simplest this is a paste made from pounded raw almonds and sugar, but that’s not particularly exciting or interesting to watch or make…and I know that if I was to have proposed that as a plan the rest of the team would lynch me for making them grind who knows how many kilograms of raw almonds for days on end; it would also take most of the week to produce the basic ingredients during which time there would be very little for visitors to see, so marchpane is out. We could go with wax and make a pretty large-scale figure that way, but we’ve done wax before back in 2006 and 2008 and although unlike the marchpane there would be progress to see through the course of the week, it would only generate “but what about the cooking?” comments; so that too was a non starter.

With pastry covered last Easter with the chastelete and simple sugar work last Christmas with the knot garden the only course of action is to go out on a limb and go with sugar casting…the most difficult method of modelling at the best of times, let alone in a cold, damp Tudor kitchen! Apart from small sugar roses about 7cm in diameter, the largest item we ever had any success with was when Jorge seemed to lose the plot and attempted to start a new cult of Aten worship with a big sugar disc made in the Kitchens back in 2007!

Jorge tries to kickstart Aten worship in the 21st century!

Simply put, there’s too much moisture in the building for success with casting sugar, it melts when cast or sets too quickly, or crystallises in the pan as it’s boiling all of which means that we tend to avoid it like the plague as it’s just doomed to failure from the outset…but these tiny details haven’t stopped me from forging ahead with this as the plan for the “thing” over the Christmas cookery…a cast sugar model of an Elizabethan woman, notionally Elizabeth I, standing around 23 cm tall and about 15 cm wide…by the end of the event the team are going to hate me!

But how are we going to make it?

In theory, that’s quite simple…make a mould, boil some sugar, pour the boiling sugar into the mould, wait a short while, pour out the excess and wait…when cold, open the mould and Bob’s your uncle, a sugar Elizabeth…easy!
Well clearly, nothing in life is ever that simple…what mould, made of what, made how, boil sugar how??? I mean, surely there must be some clues that we can follow…and rather handily there are. Casting objects from sugar has a conveniently long history with  recipes covering the technique book ending the sixteenth century.

‘To mak ymages i[n] suger’ snippet
Harley M.S. 2378 f161v
(C) The British Library

Harley M.S. 2378 contains a recipe “to mak ymages in suger” on f161v (if you prefer an easier to read version you can find it transcribed in “Curye on Inglysh” published by the Early English Text Society 3 )

‘To mold of a lemmon, orenge, peare, Nut &tc. and after to cast it hollowe within, of sugar.’
Sir Hugh Platt. Delightes for Ladies,1608

whilst Sir Hugh Platt’s Delightes for Ladies 4 contains several useful sets of instructions for casting sugar as well as details of moulds made from both carved wood and “burnt Alabaster”…or plaster; a mould of which the Museum of London has in its collection. This mould dates from the late medieval or early post medieval period and is one half of a mould that is presumed to have been for making confectionery models of St Catherine. So we have an example to go by, though I suspect ours will be a lot cruder….and bigger.

Half of a presumed pair of moulds for making confectionery models of St Catherine.
(C) Museum of London

So, using a combination of the techniques in these recipes along with the instructions by Cennini in his Il Libro dell’Arte 5 on how to make moulds for casting people and objects, we’re going to have a stab at it.
This means that we’ll be taking a wooden former in the rough shape of the figure we want to cast that, fingers crossed, Adrian has already made for us, and coating that in wax in order to be able to add some fine detail and seal the wood that it’s made from to stop the plaster from sticking to it. Next, a casting box needs to be made out of thin wooden planks and a bed of plaster poured into it to support the former…which we will need to cover in a mould release lubricant that we will have to make out of tallow and oil. Next the plaster will be poured to half cover the former and left to set…once set, this plaster will be coated in the mould release and the casing box topped up with plaster to cover the former. Fingers crossed this should mean that once set we will be able to pull the mould apart and be left with a negative space in the two halves of plaster into which boiled sugar can be poured; which once cooled will result in a sugar queen…sounds easy doesn’t it, what could possibly go wrong?!

I’m pretty sure I’ve covered all the bases in terms of ordering the equipment needed, from plaster to wooden planks, tallow to barrier cream

but there’s bound to be something I’ve forgotten, or presumed we have in store somewhere but am actually woefully mistaken as to its existence…watch this space for details of whatever that turns out to be.

On top of all of this there’ll be comfit making on most days and roasting each day, with beef on the spit every day and chickens being cooked on the multi armed spit on alternate days…as always, if you’re visiting the Hampton Court over the Christmas event and wander into the Kitchens then feel free to try your hand as a turn broach and experience life at the blunt end of Henry VIII’s House of Provisions, or see if there are any other tasks that we need a hand with…there’s always some stirring, grinding or rolling that’ll need doing and a Kitchen Team member who is all too happy to let someone else try their hand at it if it means they get a crafty five minute break from the work.

All of this sugar work and mould making will be done in phases over the course of the week after Christmas, starting 27th December and finishing 1st January, though there is roasting and all of the courtly capers upstairs in the State rooms from 21st December to the 23rd inclusive as well as the post-Christmas week. Fingers crossed we’ll have some results to show, though in truth if we only get a mould made I’ll be extremely happy. As with previous events like this I will be recording and photographing for later blog posts and will keep things up to date via Twitter (@Tudorcook)…both successes and failures.

  1. John Nichols, The Progress and Public Processions of Queen Elizabeth, 3 vols (London: John Nichols & Son, 1823), I (pp. xxxvi–xxxvii).
  2. George Cavendish, The Life of Cardinal Wolsey, 2nd edn (London: Harding and Lepard, 1827) (pp. 197–198).
  3. Constance Hieatt and Sharon Butler, Curye on Inglysch (Oxford University Press, 1985)(p. 153).
  4. Sir Hugh Platt, Delightes for Ladies, to adorn their Persons, Tables, Closets and distillatories London: 1608.
  5. Cennino Cennini, The Book of theArt of Cennino Cennini, a Contemporary Practical Treatise on Quattrocento Painting, trans. by Christiana Herringham, 2nd edn (London: George Allen & Unwin Ltd, 1922).

Take And Make a Foyle Of Gode Past – Constructing A Chastelete

I left the last post HERE having explained what we were going to do with the chastelete recipe and why, so now it’s time to answer the bigger question…how did it turn out?
Those that follow on Twitter will already have seen some of this, but as much as I love Twitter for showing what we’re doing in the Kitchen, 140 characters is nowhere near enough to fully explain something like making a chastelete…how else will I get to ramble incoherently whilst showing you pictures of slabs of pastry?!?

So as you know, we were mashing together the recipe for chastelete from The Forme of Cury along with the designs for the Henrician Device Forts to produce a large pie, shaped like a castle.

I’d tasked Robin with the main responsibility for the pie because quite simply, he’s by far the best in the team  at making pastry; Marc H, Zak, Adrian, Dave, Ross and any others needed would assist with making paste in bulk, fillings, colourings etc while the rest of the team worked on other recipes and roasting. Robin had a plan…it was set in his mind…there would be no deviating from it, and in retrospect, although the rest of us thought he was mad and he should have changed his plans halfway through day 1…he was right to stick to his guns, this wouldn’t have been half of what it was if we’d got him to change the one driving obsession he had…thin walls.

First try

So first task on day one was pastry, and lots of it. We’d already discussed how big the whole thing should be…as big as would fit in the oven, so at most 10 inches high and 14 inches wide…length in proportion but at maximum 2 feet, give or take.

The very, very rough planning of dimensions for the chastelete.

We settled on a central tower around nine inches in diameter and ten inches high, with four ancillary turrets around three inches in diameter and six inches high which would give a final product that would just fit on the tray we have to use because of being limited to using a modern oven for baking in.
Robin’s initial plan was to use a very stiff salt dough for the case so work was set to in order to produce what was hoped would be enough…as many volunteers and assistants from the visitors being sought to help out with the task and give them a taste of the work needed to make a decorative subteltie such as this.

About mid way through the day, there was sufficient paste to drive out a base sheet and place it onto the tray, which had first been filled with flour to even out the dents in the base. next task was to work on the first cylinder that would form the central tower. This did not go to plan!

Even though the paste was as stiff as Robin could make it, it was simply not strong enough to be self supporting when formed into a cylinder.

Mostly, this was down to the wall thickness that Robin wanted…it was never going to work with this pastry. The rest of us were all thinking…thicker…make it thicker, but Robin had other ideas…hot water crust…shame we hadn’t planned for that. Time to delve through the freezer and see how much lard we had in stock.
A swift hour of boiling fat & water and some hard kneading later there was enough paste to try another experimental cylinder, but not wanting to give up on the original plan just yet, two cylinders were formed around jars, one of hot water paste, the other salt dough and these were held in place with collars of paper then left to dry.

After a night in the warm embrace of the airing cupboard both tests were ‘leather dry’ and the jar formers were carefully removed. The salt dough was just not up to the task (as you can see from above after it had dried for a few hours more) but the hot water crust was good enough to show that this was the path to tread…and production began at full scale.

Crenellation Construction

The bulk of the construction of the basic pieces happened while I was busy elsewhere, so there aren’t any images to show unfortunately, not that they’d be that exciting. The paste was mixed and rolled into sheets around 5mm thick then cut to size forming rectangles that could be rolled around suitable formers. Before rolling the crenellations were cut long the top edge, then the paste was rolled up around a ceramic jar. The first experiments had shown that left as it was, the jar would stick fast to the pastry, so a layer of paper was added first then once the overlap had been sealed by damping the paste and squeezing tightly together, the whole cylinder was held together with a paper collar to keep it from sagging until it had firmed up slightly.
After an hour or so, the paste was freed from the paper and ceramic scaffolding and another was made; when all four were complete they went into the airing cupboard for the night. Meanwhile, the task of creating the central turret was causing some concern, simply because we didn’t have a ceramic jar or bowl that wasn’t wildly tapering…really not what was needed for a nice castle wall.

Fortunately thinking outside of the proverbial box meant Robin seized on the idea of using the newly delivered bucket of antibacterial wipes that we have for cleaning our office, store and break areas…it was the perfect size, but wasn’t able to be used in front of our visitors…no problem, everything would be prepared then the final forming would be done when the Palace closed and Robert would be you Aunt’s husband! (yes, I know I’ve just said that we didn’t do this in public so our visitors wouldn’t see the plastic tub, but I’m now showing you, so surely what’s the difference…context my friends, context. I can explain the why’s and wherefores to all of you here, this wouldn’t be possible if it was done ‘live’ in the Kitchens and people may never understand why we had to use a plastic bucket and an airing cupboard!)

Building and Blind Baking

So day 3 dawned and a day behind the planned schedule, construction of the actual castle could begin…if the pieces could be moved from their drying boards!
First task was to make another base plate and put this onto the newly re-floured metal baking tray. After that, the delicate task of moving the dry, but still very fragile, turrets into place. To do this Robin would utilise two of the knives in the set round his waist to carry the paste shells from board to base.

Once in place, adding the outer turrets could begin. These were first trimmed to remove a section of wall so that they would fit better to the main turret, then as before, carried on the blade of a knife from board to base to be placed carefully in position.

Once there, the previously made cut was re-trimmed to match the angle of the main wall it would bond to, and the two surfaces were held in place with beaten egg. This was repeated three more times until the basic shell was completed and ready to be blind baked.

Ready to go to the oven

As I’ve mentioned before, we are limited to having to use a modern gas oven for our baking, so it was off up to the Buttery kitchen (used by caterers when there are events held in the Great Hall) for an hour of standing looking at a stainless steel oven door.
First job was to re-seal all of the joints with beaten egg again before popping the whole thing into the oven on almost its lowest setting. We had originally planned to use dry peas to fill the castle to assist with the blind baking, but an error with our shopping meant that we didn’t have enough so Robin opted for his tried and tested blind baking method…regular checking and manipulating the paste if/as it deforms with the heat.

As you can see in the image above, the paste begins to dry from the top meaning the whole thing is liable to sag and sink as the base is the last part to firm up…a product of the modern oven not being hot enough at the bottom. This lead to Robin having to fiddle and manipulate the shape quite a bit….just after he said the doomed words “I think I feel confident enough to be able to just leave it now” as it happens.

Battling Battlements!

Meanwhile, down in the kitchen, Adrian and Dave were having ideas. I’d already asked Adrian to make some little pastry cannons to decorate the finished article with and this seems to have sparked a ‘we could do it differently’ attitude with him and Dave, so when Robin and I returned from the blind baking, sat on the table was chastelete mk2!

IMG_20160327_150937

Adrian was going for a slightly different design, 5 lobes not 4, and working with thicker paste. As far as I can tell it took 3 hours for them to get to the stage where it was sat blind baking in the oven…as opposed to 3 days!

All of this left the last day to fill and finish the original chastelete; Adrian and Dave only wanted to get this far as they knew that the ingredients for filling were limited…though Dave has taken it home to try and finish it there, should he be successful I’ll let you know, but be aware he was muttering about model people, sieges, undermining and gunpowder…so who knows what will happen with that!?!
Again, other tasks got in the way of me photographing the making of the fillings, but I can say that the end products were a marchpane mix coloured green with parsley juice, a custard coloured red(ish) with cochineal…it was supposed to be saunders but it got misplaced and the cochineal doesn’t play well with the heat of the custard…a fruit mix of apples, pears and some dry fruits, cooked together and left brown, and a white almond cream. All of this would be in the turrets round the outside, whereas the centre would hold a large, minced pork mix, spiced and flavoured with ginger, mace and a selection of other spices picked by visitors and Zak.

After filling, the final pie was slung in the oven to bake…resulting in this masterpiece!

The finished chastelete in all its glory

Was it worth all the work? Damn straight it was…likewise with all the grief over the thin walls, as Robin said to me, what’s the point of doing it if it’s easy?

A man who's as pleased as pie!
A man who’s as pleased as pie!

Clearly, I’ve mentioned Robin a lot through this, because he was the one who fashioned the beast out of flour, fat and water…but it was very much a whole team effort and they should all be rightly proud of this result.

Proof of the Pudding

All this effort, four days of graft for what? A damn tasty pie…about ten minutes after the final photograph was taken and the chastelete removed to our office, this was the result:

10 minutes after the pie was taken into the office....carnage!
10 minutes after the pie was taken into the office….carnage!

I’ve put all of the images I took into a separate gallery HERE so you can see as much as I recorded. Some of the images above will open larger if you click on them so give that a try.
As always, comments, questions etc all welcome.

Castle Capers With Chasteletes

Rather than opt for an Easter egg-stravaganza, for the last of the cooking weekends for a while (see HERE for more on this), we decided to go big or go home and work on a pie inspired by the recipe for Chastelete taken from the Forme of Cury from around 1390…but brought up to date…well, the sixteenth century at least…and made in the shape of one of Henry VIII’s coastal Device Forts. Choosing the Device Forts as a basis for the design also allows us to link to Tudors on Tour at Camp Bestival where one of the thematic strands we’ll be talking about will be the forts at Sandsfoot and Portland…but which would we choose as the model for our chastelete?

First, let’s have a quick look at the recipe itself, which although we wouldn’t be following it word for word, would be the base for our work…though please note I am and will be using the ‘royal we’ here, as it’s actually Robin, Adrian, Zak and the rest of the team who’ll be doing the actual making part, I’m just the ideas man here 😉

Clearly it’s talking about a pastry pie shaped like a castle made of five cylindrical elements, the central one larger than the outer four…so taking that layout and comparing to the Device Forts, it was a simple decision to take our inspiration from either Camber, Walmer or Sandown (Kent)…we opted for Camber.

camber castle

As I said earlier, it was to be a case of go big, or go home…no half measures, make it as big as would be possible, spend the whole bank holiday weekend making it and damn the consequences….which was easy for me to say, not so easy for Robin to swallow though; but as I said to him, what’s the point of having someone that’s a demon with the pie cases if we can’t show him off?

Well apparently flattery will get you everywhere and after making a few measurements and a couple of rough sketches he went off to put his thinking cap on and work out how he wanted to approach the build. Again, we’d follow the recipe as far as the fillings were concerned…pork pie centre with almond cream, custard, minced fruit and fritter filling turrets, but for the actual paste components, other than the fact that they would be cylindrical and there’d be five of them, the rest was up to Robin.
What he decided was to work to the limitations presented as far as our ability to bake the final pie. We only have a modern gas powered catering sized oven to bake in, so that would determine the maximum height; and the tray/sheet that would fit within that oven would determine the arrangement of the outer turrets and the maximum length and width that the pie could be. Everything after that would be experimenting with different pastes to see which type would allow him to get the size required along with his personal desire for it to be as thin as possible.

So that was the planning/thinking….how did it work in practice?